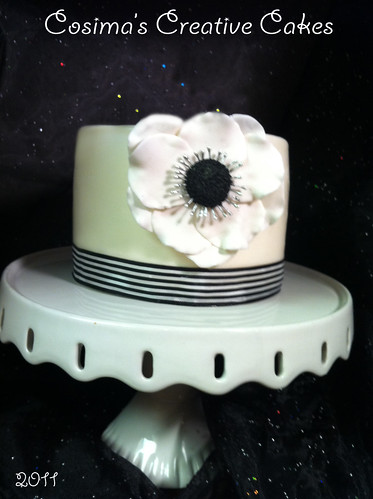
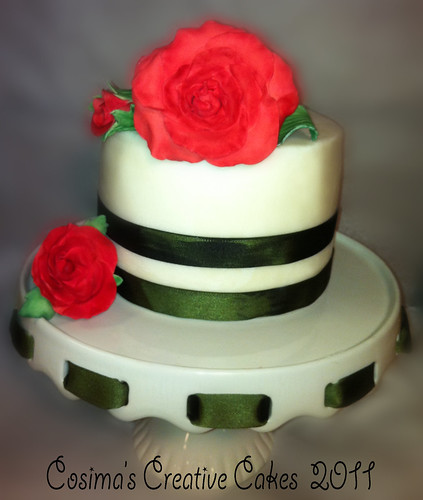
Sunday, December 4, 2011

She’s 50 & Fabulous

photo 2 (13)

Chocolate cake filled with raspberry white butter cream.  Crumb coated with Ganauche. 

I was asked to make a cake by a friend for her friend who is turning 50.  She wanted something with a martini glass.  I thought, hmmmm, since I make cakes for the fun of it, I’m not really in the mood to construct a martini glass.  I suggested to her that they buy a custom-made martini glass that she can have as a keepsake.  I lead them to


Kudo’s Kitchen offers you a unique brand of wonderfully detailed hand-painted glassware and ceramic tiles. She specializes in completely personal pieces that fit your many interests, occasions and people in your life. I’ve ordered from her and the quality is outstanding and the artwork is amazing!  If there is anyone you would like to have a personalized gift done for, Kudo’s Kitchen is the place to go!  The photo of the glass doesn’t do it justice to what it looks like in person.  One other KUDO for Kudo’s Kitchen, when your item arrives, it is beautifully and professionally packed and ready for wrapping.


The Process of the Cake:

I wish I had taken more pictures of the process.  I’ll have to remember to do so next time.

I can’t say that doing stripes is my favorite.  It was my first attempt at it and it was a painstaking process for sure.  I drew up a template within my Photoshop program.  Printed out several copies in black & white (to save on my color ink).  The pink was the shadowed color.  I measured around the cake pan and compensated for about 1/4” of ganauche to go around it.  I wasn’t sure of the exact measurement of the circumference or height of the cake, so I guesstimated the whole way. 

fondant template copyI taped together the print out of the template to be what I thought was close to the circumference of the cake, leaving a very long template on my table.  I then laid wax paper on top taping both together so the template stayed In place with the waxed paper.  Each cut out piece would be laid upon this template.

I then rolled out some fondant and laid wax paper on top of it.  Then took another sheet of the print out of the template and placed it on top of wax paper for cutting out each piece.  The reason for putting the wax paper on top of the fondant is to keep it sealed from drying out while cutting out all the other pieces.  The wax paper will remain on the fondant until the very end prior to putting onto the cake. 

The scallops along the top were easy.  Now this is the part that took *F.O.R.E.V.E.R* to do and why I’m not stoked on doing stripes.    I rolled out the white fondant and using a very sharp exacto knife, cut each strip out individually.  Then I did the same for the pink.  Once one sheet was done, I would take it to the cake template and place each one according to the template.  If you’ve worked with fondant before you would know it’s like clay and can easily be squished or disproportioned.  What a PAIN!  As time went on the process became a lil easier but still VERY time consuming!  If anyone has a solution or an easier way to do this, please fill me in. 

images (7)TIPS:

1) fondant colors can fade easily.  Even though I had the wax paper over the fondant, light can still get through.  So to ensure that the color was protected from the light and the sides (where I had cut out the image) did not dry out, I laid foil over the top.

2) Use rolling pin spacer rings to ensure the thickness is even.

Now that all the fondant pieces laid on top of the wax paper template and ready to be placed onto the cake, I did the following. 

1) I rolled and cut out some white fondant to go over the top (not down the sides) of the cake. 

2) I took a tape measure and measured around the finished crumb coated cake and then in height (to now include the fondant you just placed on top) and then trimmed the template where necessary

3) Then I removed the top layer of waxed paper from the template that was protecting the fondant from the light and drying out. 

4) Now the *COOLEST* thing about this process was…. all I had to do is roll the template up on to the cake.   LOVE THIS!  Very precise design laid in place with no movements of pieces. 

Having all my scrapbook supplies and a ton of templates, I made use of one by cutting out the number 50 along with the oval circle placed on the front of the cake.  And to think I wasn’t sure what I would do with all those templates I had stored away. 

The bow was a challenge.  I used Planet Cakes bow tutorial to make the bow on top.  What was challenging was to get it to set up like they did, but finally I was able to succeed.  They make it look so easy!  Now black fondant can easily start to look like leather so I took my steamer and steamed it right away to give it that shiny look that most ribbon have.  The photo below is shown prior to the bow being steamed.

       photo 1 (15)

The two ribbon tails on my picture above were tossed and redone once the cake was put together.  I wanted them to flow down the cake and they dried out so much that there wasn’t any movement to them.  I didn’t have the cotton batting as Planet Cake shows in their video, so I used brand new packing material.  It did the job but I want to try this again using the batting material.

photo 2 (14)Putting the cake together.  I was really proud of the layering of this cake.    I looked at it while it was setting up within the fridge and thought I should take a picture but I didn’t and now I regret it.  Ah well, next time.  Photo shows the Ganauche crumb coat.  Cake was leveled perfectly. 

Note the flower in the image above?  Well it wasn’t used on the cake because it was to big to sit where I wanted it to be placed.  So I had to quickly work another flower to fit perfectly.  flower

I have found that the following process is a nice way to conceal the edges of the bottom of the cake.  Here is a great video to show you how to cover a cake board with fondant:

Overall I love the cake.  It’ll be awhile before I attempt stripes again; however, I want to come up with an easier solution to make this process faster.  It’ll be on my mind for awhile and knowing me I’ll try it again soon.

Hope you enjoyed this tutorial.

Suz
Cosima’s Creative Cakes


Sunday, November 13, 2011

A Sweet 16 Birthday Cake for a Sweet Girl


For a sweet girl.  This cake actually wasn't exactly suppose to come out like this.  It was suppose to have one more tier on top.  BUT!  after putting the crumb coat on this cake, my right hand literally gave out. I didn't know what in the world happened...... this has never happened to me before!  But all I could say, the next morning I couldn't even hold my coffee cup....it was that painful!  My husband, whom lives with Tendinitis, says you are using  your hand too much! 

I wrapped it up put on the brace that my son once had when he broke his hand and let it rest the full day.  I sat there and wondered "WOW, What would I do if I had no use of my right hand?!?!"  I live to do artistic things; whether it be cakes, photography, digital art..... and to live in pain the way I was that day was really an eye opener in so many different ways.  And WORK!  By trade I'm an Esthetician and that would just put a HUGE damper on making a living.

The cake ended up being decorated on top of the crumb coat.  Thank goodness I had all the elements done days prior.  The ribbon wrapped around the bottom was suppose to be fondant.  All in all the cake came out beautiful.  The crumb coat could have been smoother but I had to work with the abilities my right hand had left me.

Danielle loved her cake and it was plenty to feed everyone, with some leftover.  Cake flavor was Oreo Cookie with Oreo Cookie Vanilla filling.

Tuesday, November 1, 2011

DO YOU PIN? What is it and why do it?

Planning parties, weddings, photo-shoots, a trip,?  Create a board for your favorite recipes, crafts, bucket list, favorite websites.  <---------- These are all reasons you should pin.

  • Remember that bedding set you loved and saved within your favorites folder?  You go and look for it and you have to go through a bunch of different bookmarks spending wasted time figuring out which one it was.  With Pinterest, you don’t have that problem.  You just go to the board you put it under, find the image you pinned.  Easy Peasy!
  • Are you remodeling a room in your home?  Pin different ideas and when you need to refer to it, it’s all on that board.  Not to mention the links also with it….. Surprised smile Loving it
  • I read my favorite blogs everyday and when I find something of interest, I pin it.
  • Follow people located on Pinterest that have the same interest as you.  You just follow the board they have and every time they add something it appears on the front page of your Pinterest as a new pin and you have a choice to repin it to one of your boards.  Now you have the pin and the website where that pin is located.
  • Put the Pin on your browsers toolbar so you can easily pin different sites on the web. 
  • When I see something I want to share on my Facebook or I want to Tweet it, I can easily do that while pinning, just check the box and it automatically embeds to your social network of choice.

I’m addicted.  I have over 3,400 pins and it just grows and grows and grows.    If you aren’t pinning yet, then get started.  I promise you, you will be addicted and it will be your main reference to things you find interest in.  HAVE FUN! 

Follow Me on Pinterest

pinterest

Sunday, October 23, 2011

13th Cake - Bella’s 8th Birthday

   Bella's Cake  bella pic copyMiss Bella was celebrating her 8th birthday and she asked me to make her cake.  I sat down with her and asked her what her favorite colors,  hobbies & elements were.  First thing she said was her favorite color was “black” I gave her a look of yellow astonished look copy but then was able to get her to give me some other colors.  So Black, blue & purple she chose (sounds like a bruise to me….. to go along with the theme perhaps?) and she was having a roller skating party and her favorite elements of choice are stars and butterflies.  Oh how my head of creation was turning. 
cake topper copy
I started by making the cake topper earlier in the week.  I wanted to create something that she would be able to keep afterwards.  I came up with the cutest creation!   Butterflies & stars incorporated.  Note the glitter must be a non-toxic glitter when messing with any food-product.
Top layer of the cake is a dummy cake.  I wanted her cake to be big and extravagant but without the abundance of leftover cake. Covered the Styrofoam dummy cake with fondant.  I created the sugar transfer sheet in Photoshop and had my local Nob Hill Store Bakery print it out for me, which was placed around the fondant.  Two sheets were used and it didn’t quite fit the circumference of the cake.  I had a gap on each side which didn’t please me.  I must conquer that issue……a future task of mine to defeat!

002011 
The circles on the first layer are a mixture of 50/50 fondant/gumpaste and the purple is sprinkled with luster dust and the blue is airbrushed blue then sprinkled with iridescent edible glitter.  Did this a couple of days ahead of time and placed in an airtight container until ready for use. 
Bottom layer is four layers of Oreo Cookie Cake with Oreo Cookie Frosting.  Didn’t put fondant along the bottom layer because I wanted to perfect my buttercream application.  Came out pretty darn cute and it was soooooooooo good!  Probably one of my favorite cake recipes to date.
Recipe for cake: Oreo Cookie Cake & Frosting Recipe.

OREO COOKIE CAKE POPS – DaBOMB!

cake pops copyHow many times after carving up a cake you have a ton leftover?  I do all the time and with that leftover cake I make CAKE POPS! 

Ingredients:

  1. Put the leftover cake within a mixer.  I added another cup of crushed-up Oreo Cookies and mixed it with the cake until it was well combined.
  2. Then pour in the frosting.  I start with 1/2 cup and add until I get a doughy consistency.  Pour into a bowl and put into the fridge to set for a bit about 15-30 minutes.
  3. I have a Non-stick Silicon Round Mold 41zQvk7461L._SS400_ I will pack the cake mixture firmly into each circle.  I then take a knife and scrape along the top so I have a flat center.  You do not have to have the mold, I do only because I want my pops to be a uniform shape and when I freehand it, they are either bigger or smaller then the rest.  I just found this to be effective, however, more time consuming.
  4. Put back into the fridge to set (5-10 minutes)
  5. Flip mold over and release the pops. 
  6. Take a dab of frosting or Royal Icing and glue two halves together and WAALAH a perfect cake pop round.
  7. FOLLOW “Decorate This Cake Pops - A Tutorial” for the rest of the instructions.  Best instructions I’ve found to date.
  8. For my toppings, I used more of the crushed Oreo Cookies. 

These are incredibly delicious and you will receive a ton of compliments on them!  Enjoy & Happy Baking!

Oreo Cookie Cake & Frosting

  • oreo_cookie Any cake mix you like
  • 1C of crushed up Oreo Cookies

Directions:  Follow cake directions, adding crushed up Oreo Cookies to mix.  Bake as directed

FROSTING:

  • Frosting of your choice
  • Crushed Oreo Cookies – Amount to your preference

Directions:  I use a Marshmallow or Vanilla Buttercream frosting for this so it tastes close to an Oreo Cookie.  When filling the cake I sprinkle a good amount of the crushed Oreo Cookies on top of the frosting.  Recommendation:  This is best if done closest to the serving time as possible, no more then 24 hours, so the cookies DO NOT get soggy.  You still want to have the cookie crunch texture. 

CAKE-PAN RELEASE

017 No more grease & flour, Pam etc.  This is all I ever use anymore!
Ingredients:
  • 1/4 cup Shortening
  • 1/4 cup Vegetable Oil
  • 1/4 cup All Purpose Flour
Instructions:
  1. Combine all ingredients and store in an airtight container. Can be kept for three months and does not need refrigeration.
  2. Tip: Use a silicone bristle pastry brush for easy clean up. Cover all nooks and crannies to ensure that your cake pops out nicely.

Some comments on this recipe that I found useful:

  • Mix on slow to med speed of your mixer until it is light and fluffy like whipped cream. This can take up to 10 minutes. Don’t be in a hurry for best results. Stores best in a sealed glass jar. I liked to keep mine in the frig to prevent seperation of the oil.  If you live in a very high humidity area also add a 1/4 cup of cornstrach
  • I use all ingredients in 1 cup amounts. I store in a jar with a lid. When whipped, it occasionally separates. Just stir the oil back into the mixture. Keeps indefinitely (well, I have never had it spoil before it was gone). Great stuff.

http://cakecentral.com/recipes/pan-grease-cake-release-recipe/

Saturday, October 15, 2011

12th Cake - Our 22nd Anniversary Cake

Spending time up Lake Tulloch with amazing friends celebrating our 22nd year Anniversary.  Couldn’t be any better!  Well one most important person missing is our son who was stuck at work :(
22 anniversary cake copy
Chocolate cake with chocolate mousse filling and Bavarian Cream with fresh Strawberries.  MMF covers the cake.  Roses are gumpaste flowers and lil flowers mixed with 50/50 fondant & gumpaste.  Fun cake to make.  Now the chocolate numbers was made for me by Raffine Chocolates located in San Ramon California.  The smoothest chocolate/caramels you’ve ever tasted. 

Wednesday, October 12, 2011

Anemones

Anemones 


To go with the black & White theme, I did a chocolate cake with a strawberry infused flavoring added to the buttercream filling (keeping the filling's color still white).  Made for a girlfriend's birthday whose theme was black & white.  Anemones flower is made of gum paste and airbrushed Super White.

Tuesday, October 11, 2011

Gumpaste Laced Crown

I hate making cupcakes and don’t.  But in this case had some leftover batter and wanted to experiment on some miniature gumpaste laced crowns.  Enjoyed making these little things.

crown copy

11th Cake – Bridal Shower Cake

Sugar Gum Paste Rose atop a white chocolate cake filled with pineapple & bavarian cream.
Bridal Shower Cake

Sunday, October 9, 2011

10th Cake – 24 Hour Fitness

photo 4 (1)


I planned on making the cake for our picnic which was held on a Saturday and the Friday prior I was going to put it all together.  I ended up having a really bad day on Friday which turned out being a really bad headache on Saturday so I ended up not going to the picnic.  With that said, come Sunday I started putting the cake together and brought it in Tuesday. 

This is one of my favorites!  Loved making it and it also posed some challenges.  The athletic figures!  I started working on the figures a couple weeks prior. I had first done it with gumpaste; but for whatever reason it wasn’t coming out the way gumpaste should (See image to the right).  GYM ISSUES #1So I tried another option by making a batch of black royal icing and piping it over waxed paper and those came out beautiful BUT…..  1) They weren’t very sturdy and 2) OMG if someone ate those they would have BLACK teeth!  Wasn’t having that! So I decided to make new batch of gumpaste and as you see on the cake, they came out fabulous!  I printed out some silhouettes of these athletic figures and put it over  gumpaste and using an exacto knife cut each one out.  Let it stand over night, filed down the edges and then painted them with very black gel paste.

My other challenge, what the heck happened there!  URGH!  Not happy with that.  MMF – love the stuff but if you DO NOT knead it enough it will look like that.  I peeled it off and made a new batch and started all over again.  Now it’s perfect. 

   Marshmallow Fondant Messed Up 

What I loved most about this cake are of course the athletic figures and I love LOVE the topper.  I had saved some kettle bell images 24’s logo from the web and printed it out at my local Nob Hill store (Thank you Nob Hill for having an edible printer so I don’t have to buy me one) and cut and painted some stars silver (silver gel paste for paint) attached them to curled up wire stuck them in a flower votive that was inserted within the middle of the cake and WAHLA! 

Needless to say, making cakes pose challenges, and that as you should know about me by now, I’m all about.  Hit me with a challenge and my plan is to conquer it with success.  And that cake showed success. 

PS:  Each figure represents some of our people I work with:  The muscle guy is Emil.  The basketball player is Jasko, Stevie & Vili. The girl doing tricep dips is Brandy.  The spinner is Mel. The Exercise Ball overhead is Victoria.  I love my co-workers!  And they deserve to eat cake!

9th Cake – Reveal Gender Cake

front

My good friend John and his friend Tami asked me to make a Gender Reveal Cake for their BFFs Paul & Yia.  Of course I was honored to do it.  The challenge with this cake was that they wouldn’t know the sex of the baby until Thursday and I had to have it done by either Friday night or Saturday morning.  OMG!  I worked my hiney off on this one!  There are a lot of imperfections to this cake, that if I had more time, they would have been perfected.  Loved doing the gift-box affect; first time doing that!  As you can see by the photos below “IT’S A BOY!” and they were thrilled beyond words!

8th Cake – Farewell Kelly

We’ll Miss You!  I wanted to do something special for my sweet co-worker, Kelly.  We work together at 24 Hour Fitness.  Our co-worker and good friend to Kelly, Rebecca,  says she loves Hello Kitty and I thought with short notice I can pull something together on this.  My objective was to do a flawless buttercream cake.  I didn’t have enough time to pull together a Hello Kitty sculpture so I bought a Pez and put in place.  I had extra cake after cutting down the sides so I made some cake pops.  Cake was lemon with lemon-curd/buttercream filling.  Very good, so I heard :)  Top was a fluff of cotton candy…… Lesson learned, cotton candy shrinks up after being in the fridge.  The fluff was no longer fluffy :(  No more cotton Candy on cakes in the future. 

   photo 1 (6) copy

7th Cake – MY FAVORITE!! – Made for my husband’s 50th Birthday

normal_1312885499


Presented on August 5th, 2011.  This is my favorite!  The most challenging thing about this cake was well the grapes.  If I had taken the time I needed to, to make these grapes I’m sure they would have come out much better.  But I really didn’t do my research on how to do it and would change this next time around. 


009The bottle was fairly easy for me.  Made of gum paste with a photo printed from my local Nob Hill store’s edible ink printer .  The bottle was airbrushed and then coated with corn syrup and alcohol to give it a glass affect.  Came out stunningly beautiful.  Only criticism I have on that is I don’t like the write border showing around the image.  

The sides are made with fondant and I did a wood grain with some tools.  I stamped “The Lake House” on the sides (Thanks John for helping the aligning of this – we had fun doing it).  The filler around the bottle happens to be fondant.  Well we tried pushing it through a pasta machine and for the most part it worked but it was a challenge.  Even Nonna was in on that challenge. 

The cake had five layers and multiple fillings.  There was far more cake then was eaten….. That is something I will have to learn to tackle….. making a cake for number of plates.  But overall it was a hit, my husband loved it and it was a weekend of cherished memories!

6th Cake – Made for my doctor’s office

photo 2 (2) Photo doesn’t do it justice.  I made this cake for my doctor’s office to thank them for all their kindness they’ve bestowed onto me.  The cake is chocolate crumb coated with gnauche and has a cream cheese filling.  All covered in MMF (Marshmallow Fondant) and the bottom border is piped gnauche.  Flowers are fondant and branches are piped gnauche.  I also wanted to try a stamp embossed effect that you will see on the rock below.  The letter’s were far to small then I wished.  Not my favorite cake but I learned the following:  The flowers I should have cut out a lil thinner.  The embossed letter are a no go for the future.

5th Cake – JeanMarie’s Birthday Cake

photo 3I love this ruffled look and had to try it.  The flowers are fondant flowers and inside is a strawberry cake with a strawberry  filling.  I thought it came out beautiful but was questioning the taste.  I never know until the time of cutting.  The loved it :)  I truly enjoyed making this cake but MAN-O-MAN bakers who were with piping have to have carpel tunnel because when I was done with this “lil” cake my wrist was really hurting.  photo 2

4th Cake – 4th of July

photo (17) Not one of my favorites but was a lesson learned.  When placing the top cake I put it on wrong and therefore didn’t portray a topsy turvey affect.  Bottom layer was carrot cake with cream cheese filling and top layer was chocolate with cream cheese filling and mini chocolate chips.  It was still a hit at the party and everyone loved the carrot cake!  It’s now a signature cake of mine :)

3rd Cake – My long-time friend Joey’s 45th Birthday

photo (14) Cake presented on June 18, 2011.  This was a fun cake to make.  There were kids at the party so we covered the naughty parts with leaves and after we sang Happy Birthday we shoo’d the kids out….. removed the leaves and let Joey have at it.  But because Nonna (Joey’s Mom) was is in the room, he wouldn’t do what he really wanted to do.  We asked Nonna to leave but she refused so we had her turn her head.  It was pretty hilarious.

2nd Cake – A disaster!

May 29th was when this cake was presented.  At least this was for my son’s 21st birthday celebration and only close friends were there.  LOL 

photo (13) 
I probably didn’t give myself enough time to do this cake. And I don't think it was dense enough because it fell :( The candy was really cool until I got to my destination and tried to put the can on the top of it and it crashed. TOTAL DISASTER. My son asked "Mom why don't you just make a regular round cake?" I tell him “cause..... I'm trying to be creative.” He laughed at me LOL.  PS:  He doesn’t like Fondant.  He says “Don’t put that paste on my cake.”
The cake was a white cake mix cake and I can’t remember if I densed it up or not but either way it wasn’t dense enough – LOL.  Stacked up with an orange-creme filling (probably put too much of that too and didn’t let it set in fridge long enough and that probably contributed to the fall) then covered with fondant and airbrushed it to look like a stein.  The foam on the top is meringue and the candy was cool until I was dumb enough to try and put the can on already hardened candy.  Oh well, lesson learned and hey they say you learn from your mistakes, right?  I’m ready to take that challenge again!  I know I can make this cake perfect next time! 

normal_1270144584 This was done by enchantedcreations on Cake Central and is what inspired me to make my son’s cake. 

1st Cake & About Me

So everybody asks me how I got started or how did I learn all of this. I sit there and think to myself….. “How did I get started?” “Where did I learn all of this?” Here’s what I came up with. My family is full of artists. My mother had so many different art projects for us throughout our lives and from that we all carried it with us. I’ll never forget my mother’s cake she did for a baby shower. It had two carved booties atop a sheet cake that I thought was just amazing. Now back then we didn’t have the internet or vast sources as we do now; maybe a book and that’s it. My older brother is an amazing photographer, my little brother is an amazing oil painting artist and can draw like none other. Me? What did I become? Well my friends call me “Jack of all Trades” All I can say is if I see something and it appears to be a challenge, all the more reason for me to do it.
So how the cake decorating started? Well I “THINK” we can blame the Cake Boss Buddy Valastro of Carlos Bakery for that. I think I saw him doing something that looked almost impossible and of course my mind goes to where there is a challenge and I decide I’m going to try an impossible.
So my BFF’s daughter’s birthday is coming up and I call her and ask her if I can make her daughters cake? She of course says yes and puts her daughter on the phone with the idea of cake she would like to have. She tells me “I want red-velvet cake with cream cheese filling, sea turtles, big blue waves.”  I do a Google Search and came across Cake Central which has the largest source of cake resources one could ask for! 
normal_1254951185While searching all the beautiful cakes on Cake Central, I found this cake I wanted to make.   “What was I thinking?!?!?!? Well I was only going to do three tiers but imagine, I’ve never decorated a cake in my life and I choose this one?!?!?!?” Like I said, I like to challenge myself. Well in the end, this is how the cake came out and I must say for the first cake made I did a darn good job :)
Since making this first cake, I’m totally obsessed with making more.  Learning from vast sources is helping me to become Cosima’s Creative Cakes.  And I’m only doing this because my friends said it’s a must for me to do.   

The End:
Oh I have to meet the Cake Boss!  Why?
1) It’s his fault I started this – my husband isn’t to happy with him right now LOL
2) I’m Sicilian and so is he so we could have a lot of hands flying around while speaking to each other ;)
3) His show has made me LMAO & cry too. 
And finally and most importantly
He inspired me!